I’ve finally assembled all my notes and pictures from my Boulder Mountain to Moab Hike from this past May. It was an exciting trek, so I’ve split it into four parts to capture much of the detail from the 18-day, 283-mile trip giving each section its own extended photo gallery.
NOTE:
also see the Interactive Map for this hike or the Video Trip Report.
Let’s begin…
FLASHBACK — May 2012:
After months of planning and 11 days of hiking, I abandon my Bryce to Moab hike with a severely infected blister on my foot and strained leg. I’m bummed.
May 2013
I set out again to properly finish the hike and make it to Moab. I’ll admit – there was a part of me that was a little apprehensive, wondering how my body would hold up this time out. Was my body getting too old for such abuse? I wasn’t sure.
And one may ask… why even bother? That I could answer. True, one can relatively easily visit most of the places I trek across by driving backroads and doing dayhikes or short overnighters. But, with an extended hike comes a special connection to the land: To walk to the horizon knowing you won’t be turning around; To look out across vast landscapes nearly completely undeveloped knowing you have to find a way across; To feel the ebb and flow of the weather and have to adapt; To need to find water as the requisite fuel to keep moving forward; To experience the landscape slowly evolve from a red-walled canyon, to desert shrubland, to soaring mountains… These long-trek characteristics make me feel alive and are the reasons I hope to still be doing them for many years to come.
So, with all that in mind, I suppressed all thoughts of growing too old and set out for 18 days!
Day 1:
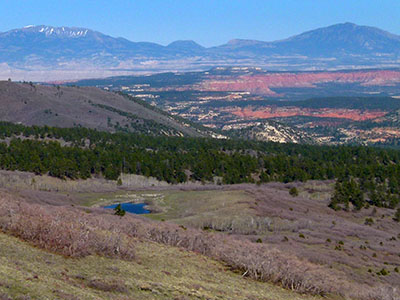 Instead of picking up exactly where I left off last year, I decided to begin north of Boulder on the upper slopes of Boulder Mountain. This route would allow me to explore an area new to me by connecting a few old pack routes which descend to Upper Gulch. The low snow year allowed the upper slopes of Boulder Mountain to be mostly snow free and thus the route was viable.
Launching from the Homestead Overlook, I made a beeline for the lake not too far below to the east. Cross-country wasn’t too bad until after the lake where I got stuck in deep brush. I fought my way back up a ridgeline and fortunately stumbled onto a little-used trail. Travel from this point down was much easier passing a string of small lakes. The trail ran alongside a small creek for a ways before the spring runoff overflowed and inundated the trail itself.
 The trail emerged from the forest and then promptly dispersed on a small plateau. Just as the trail basically disappeared, there were a couple NFS signs marking “trail”. This seemed to mark the way into Stair Canyon, but I wanted to head south back toward Steep Creek so I headed out cross-country once again.
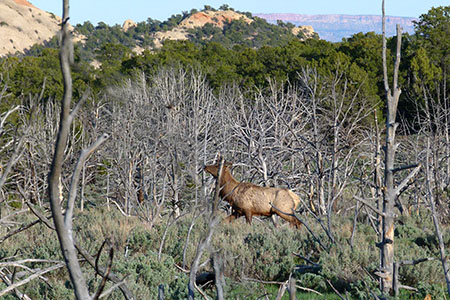
Headed south I startled three elk grazing in a meadow among the skeletons of pines from an old fire. Elk are such big and majestic animals — to see them here was a treat. Later I couldn’t find the old route off the plateau to the south, so I made my own way. The descent wasn’t too tough to the peninsula where I headed east toward the Upper Gulch. Though I never did pick up the old route, I was able to find the path of least resistance. I made camp down near the wash. I was ready for camp, though I was disappointed that there was no water here despite walking near water all day long.
Day 2:
It was a cold night – one of my coldest ever in Utah. My water bottle that I left outside froze! My body warmed up once the sun came up and I was walking again. I picked my way up and around the cliffs on the upper slopes of Impossible Peak making my way east to where there were great views down into the Upper Gulch.
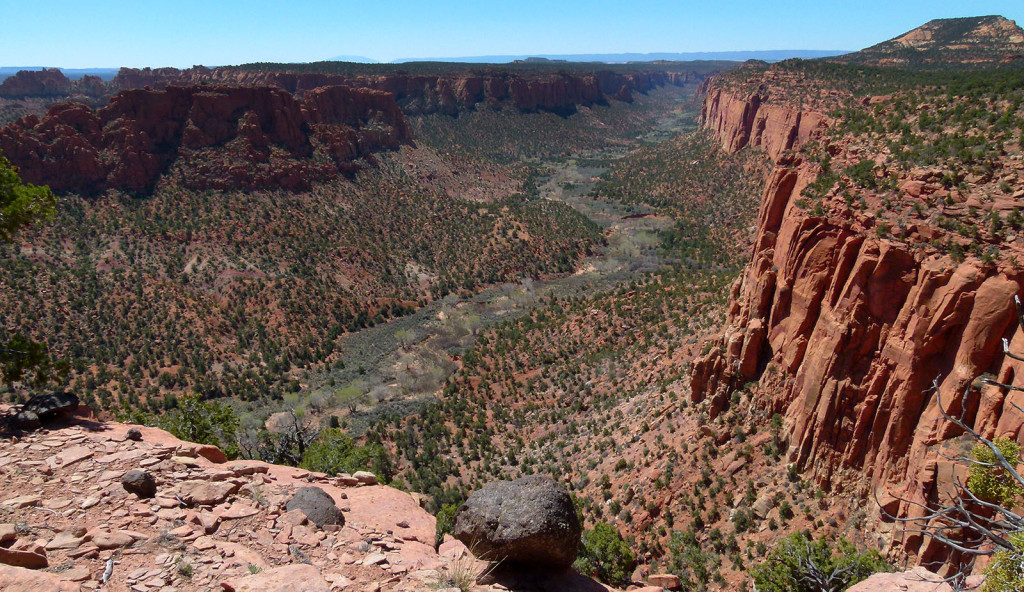
There was definitely no way down in this area as the sheer cliffs dropped several hundred feet. Having not seen any sign of a trail I was a little apprehensive about finding the correct way down. Also MIA was the spring which old maps showed on the upper slopes. As I rounded a major bend I was expecting to see the sheer cliffs give way to a slope to the creek. Sure enough, the sheer cliffs did subside, but not to a clear cut path by any means, but instead to a huge jumble of chunky rocks. There weren’t too many options available for heading down. After working one way for a while, I could tell I was about to be ledged out, so I turned around and headed farther south as I made my way to the point.
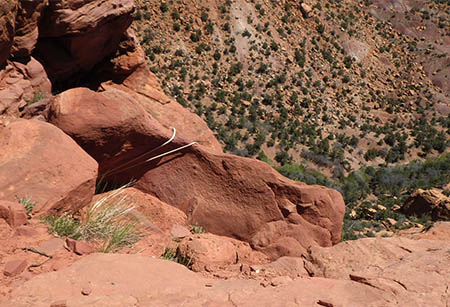 As I descended a bit more I saw something unusual – a pair of ropes on the back-side of a huge boulder. I immediately had a sinking feeling as I knew that the only time people use and leave ropes in a place like this is if it is the only way. I went down and saw the ropes were positioned at the shortest point to reach the ledge l below – though it was still a good 15’ sheer drop down from where I stood. Not ready to face this obstacle, I dropped the pack and scouted a ¼ mile in both directions to no avail. The path that I had been on earlier sure enough did end on an impassable ledge. In the opposite direction I made my way into a gully that descended a series of dryfalls. A few of these were 6-10 feet drops and it looked possible to descend them, but it might have been tricky to get back up. I considered this risk, but shied away when I realized that there might have been one more drop just around the corner out of view. Running low on water, I decided to go back to the ropes.
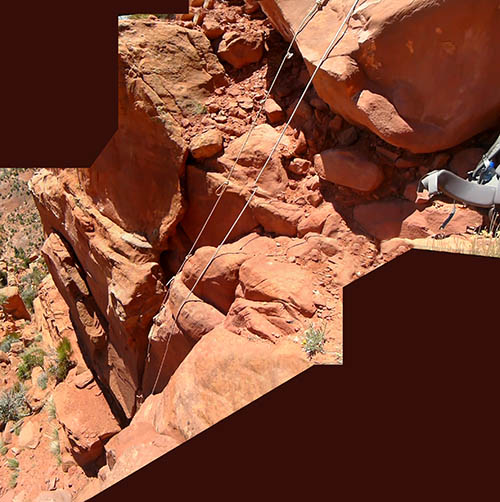 I am not a climber. I am aware however of the inherent danger of using old ropes. Left exposed to the elements ropes become weak over time. These ropes looked like they were in decent shape – but there was no way to tell for sure. The drop was pretty much sheer, so I would have to rely on the ropes holding my full weight. There was one straight rope and another with loops every few feet for hand/foot holds. To test the ropes I tugged on them. They seemed solid, but I knew this was in no way equivalent to my weight. Next I lowered my pack. Again it held firm – but again this was only a fraction of my weight. The area below the drop had a few rocks, but I figured it wasn’t a terrible location if I did indeed fall. There was also a good view of the sky, so if something did go really awry, I hoped I would at least be able to get to my SAT communicator to get out a message. With that little morale boost – I got in position to climb down.
I wrapped the straight line around my waist with quite a bit of slack. My hope was that if the other rope snapped, this technique would at least provide a little break on my way down. My fear was if was too tight, it might tangle during my proper descent – but that was a risk I was willing to take. After a deep breath, I slid off the edge and the main rope went immediately taut… and held firm. I lowered myself a few loops on the rope using only my arm strength. I decided not to try to get a foot into any of the loops as it just seemed a recipe for disaster. There was a tragedy in Zion earlier this year where a guy died after getting inverted on ropes and got stuck overnight. Besides – I had my eye on a small crack foothold and tried desperately to lower myself to it as quickly as possible as I didn’t want my full weight on the rope any longer than necessary. I was ecstatic when my foot slid onto the foothold and took the bulk of my weight off the rope. From here I re-positioned my hands down a few loops and then slide down a few more feet with full weight back on rope. Then, what I had feared became a reality as the secondary safety line became tangled around my waist when it ran out of slack. A small bit of panic shot through me, but somehow I was able to instinctively find another foothold to take some weight off the ropes and thus free myself from the second roped completely. At this point I was only about 8 feet up so I slid down the remaining rope and was so incredibly happy when my feet landed on solid ground a bit earlier than I expected. Big sigh of relief to be back down beside my pack at the bottom of the ledge. But then… could there be more? I continued climbing down one 5’ ledge after another. It was tough work, but there were no more ropes and nothing else which even required taking off the pack. Within 20 minutes I was relaxing under a cottonwood beside the creek looking back at the crazy route down:
(click above image to see full-resolution.)
From here I planned to head south over a low pass into Egg Canyon, but feeling the need to make up some time I instead opted to go north to connect with a Jeep road which I would take out to the Circle Cliffs. Once on the road my rate of travel picked up considerably. The next few hours I traveled farther than I had all day to that point. I never did see any vehicles, but I was happy to see a few stock ponds with water as I walked. I stopped at the one near the Lampstand as it had a circular trough with clear water. Even better – I found the covered source to the well so I filled up my water bottles. I didn’t max out my water as I knew I’d pass another spring later and even hoped to possibly get to the Onion Beds water source to camp.
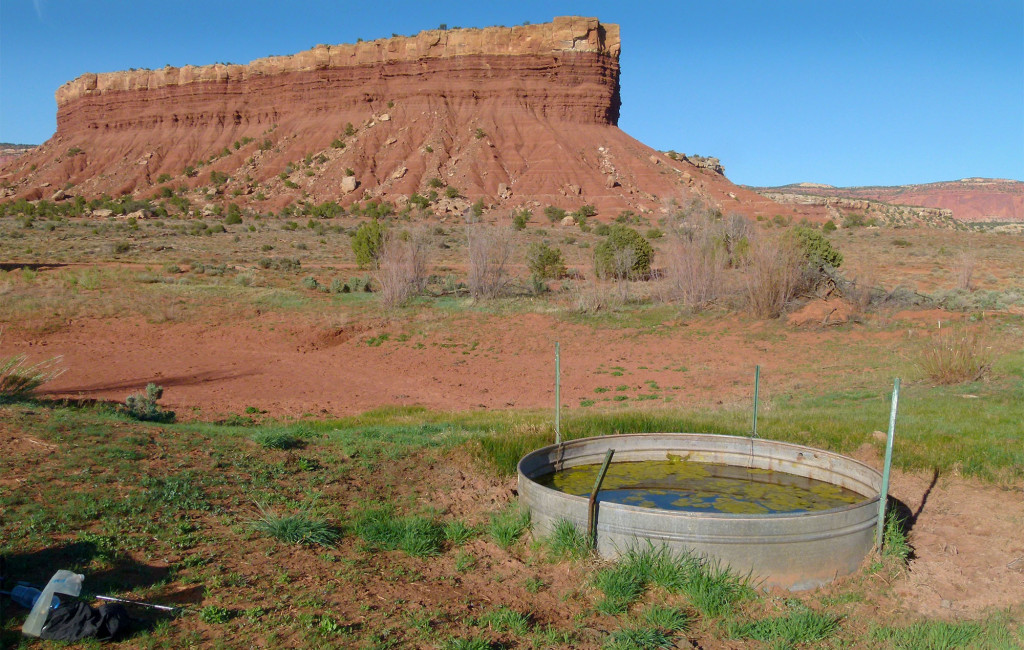
Walking along the road was nice with the sun behind me illuminating the northern Circle Cliffs and the Waterpocket Fold to the east. When I got to the point where a side-trail went about a mile out of the way to the spring – I decided to pass it up as I still had plenty of water and didn’t want to spend the extra time. At this point I knew I wouldn’t make it to the water at Onion Beds for camp, but I knew I’d be there fairly early in the morning. I camped in a fairly uneventful spot among some juniper trees just inside the boundary for Capitol Reef National Park.
Day 3:
In the morning I headed out and quickly connected with the Onion Beds jeep road. I took some pics of possible access routes into the northern reef, but no time to explore now. Instead I kept on track to the south until I reached the Onion Beds which to my surprise… were completely DRY! The cracked mud and dead brown reeds were a stark contrast to the scene almost exactly two years ago when a small lake was surrounded with lush vegetation and provided habitat to several types of waterfowl. Now I wished I’d topped off my water back at the well! But… I knew there was a seep on the way into the Fold and as a last resort I should be able to find stagnant water in the slot in Upper Muley Twist.
I kept going trying to talk myself into being happy for not having to carry a bunch of water. The first major gulch into the fold provides awesome views – but I learned last time that it ends in the middle of the slot, so it’s not the way to go. Instead I climbed up the steep banks to gain access to the hidden second gulch passing a bunch of petrified wood along the way.
The descent into the gulch wasn’t too bad as I followed the northern edge of the cliffs and didn’t get down into the actual streambed until halfway down the canyon. When I got to the point where the seep was before, I was dismayed to only find a patch of wet sand. I probably could have dug a hole to get some water, but I didn’t want to expend the effort and instead decided stagnant brown “slot” water would have to do. After a few minor downclimbs later I was at the bottom and greeted with Cap Arch right at the junction of Upper Muley Twist Canyon.
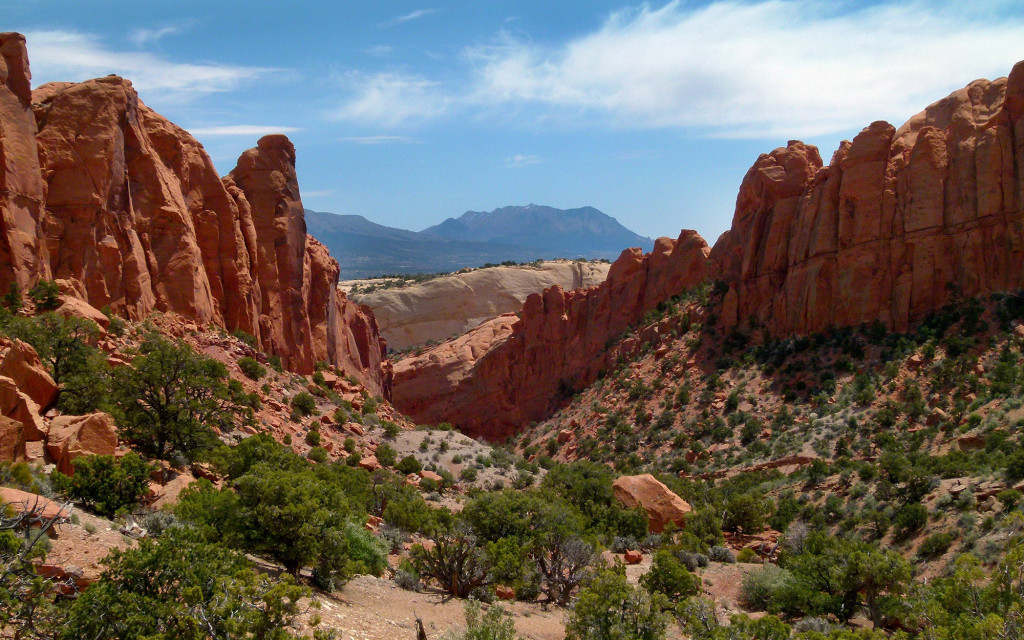
I headed up canyon and before too long was at the spot with the slot bypass takes off on the east rim. I dropped my pack here to instead go up the slot and retrieve some water. About a quarter of a mile father I reached the dryfall which ends the lower slot and once again I was astonished that there was absolutely no water. This stretch had several pools last time, but this year the sand wasn’t even damp. I attempted to get up the moki steps to access to the upper slot, but I couldn’t do it solo. Now I was getting concerned about water. I was trying to remember if there was access to the potholes from the bypass route. Even if so… would they have water this year? Maybe not, but it was still my best chance to find water. Back at my pack I did an audit of my water and found that I actually had less than I thought – under 1 liter! With this in mind, I decided that I should head down the main canyon where I might find water (unlikely) but I would (more likely) run into some day-hikers and see if they had extra water at their vehicles. I was bummed that this plan would mean bypassing the awesome Rim Route, but I’d done it before so it was a necessary sacrifice.
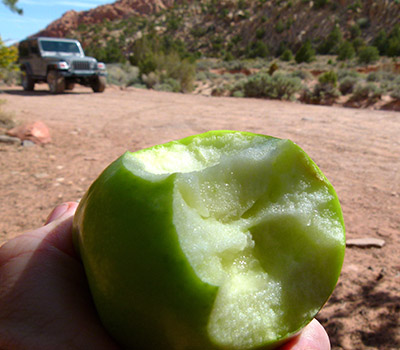 Sure enough there was no water to be found going down canyon. I even explored a narrow side canyon I’d been to before which had several deep pools last time – only this time I found nothing but damp sand. BUT… I did run into Michael and Sandy from Washington who were very nice and gave me a liter of water on the spot and promised more back at the trailhead. They were going to hike to Strike Valley Overlook, so I took my time photographing some arches and met them at their car – where sure enough they loaded me up with nearly a gallon of water and the best apple ever!
Replenished, I too hiked up to Strike Valley Overlook. It’s an incredible viewpoint. It’s not quite as awesome as the Rim Route, but still pretty cool. I had originally hoped to find a way down from the overlook to the east and to Notom Road. A friend had scouted this possibility a few weeks earlier and gave an unfavorable report of the chances. Once on top – it definitely looked daunting, but I’d still love to give it a shot someday. Today was not that day however as I wanted nothing more at this point than an easy walk down the Jeep road with my near-gallon of water.
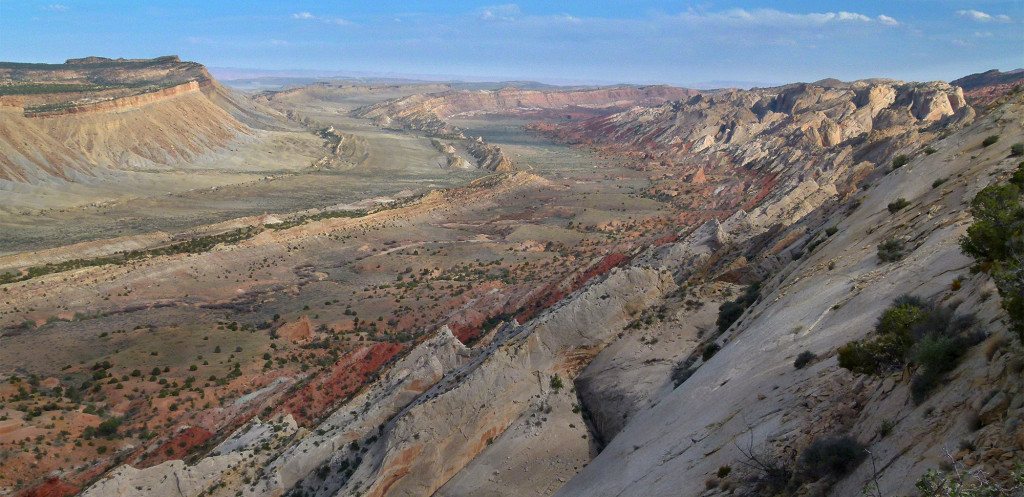
When I got to the end the Jeep road near Peek-a-book Rock I was surprised to see a bunch of people. Turns out it was a Photography Tour capturing sunset on the arch. I sat down for a while to take in the view myself. I even snapped a picture – with much less precision those who had traveled here from around the world! (But I still like it!) In additional to the great view – group leader Rod Planck gave me more water!
I camped up on a slickrock bench a little farther down the canyon.
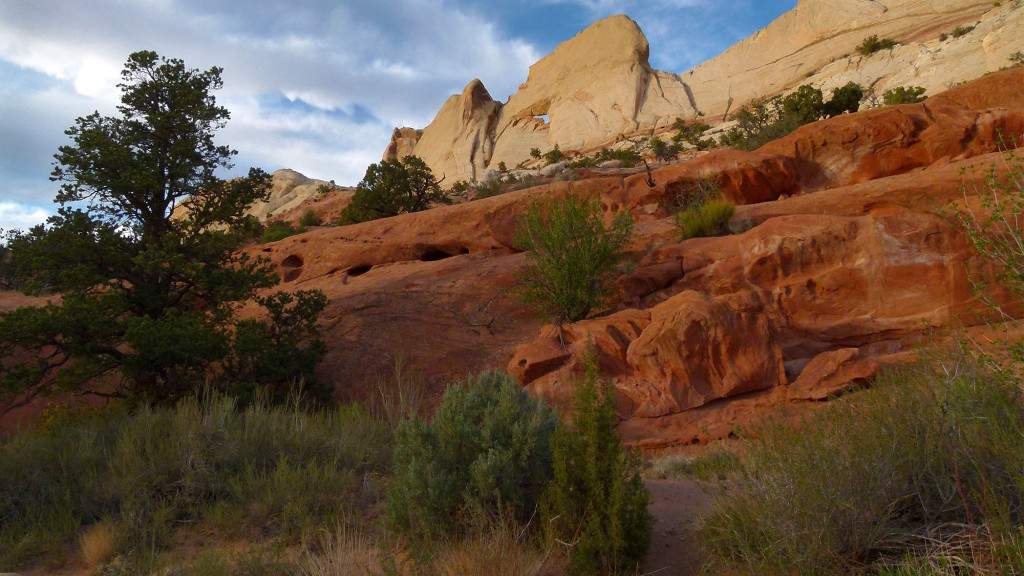
Day 4:
In the morning I considered exploring for a new way up and over the reef, but instead I was anxious to just get over to Swap Canyon to see what the water situation was like there. So, I headed down the wash until I ran into the Burr Trail gravel road and went up and then over the switchbacks. A few vehicles passed me along this popular section; none stopped to talk so evidently my walking down the road didn’t seem too abnormal here.
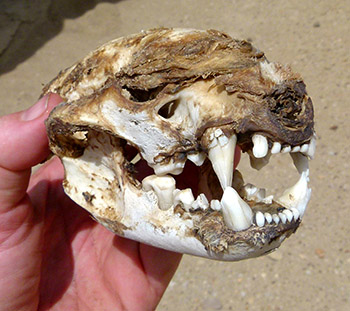 Once down I found my way into the wash heading east and up the canyon that cuts into Swap Mesa. I found this skull. After doing a bit of research online, I believe it belongs to a mountain lion. I definitely wouldn’t want to see those teeth so close on a live creature!
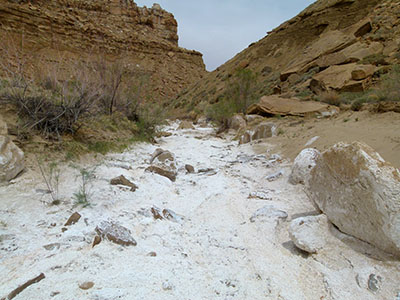
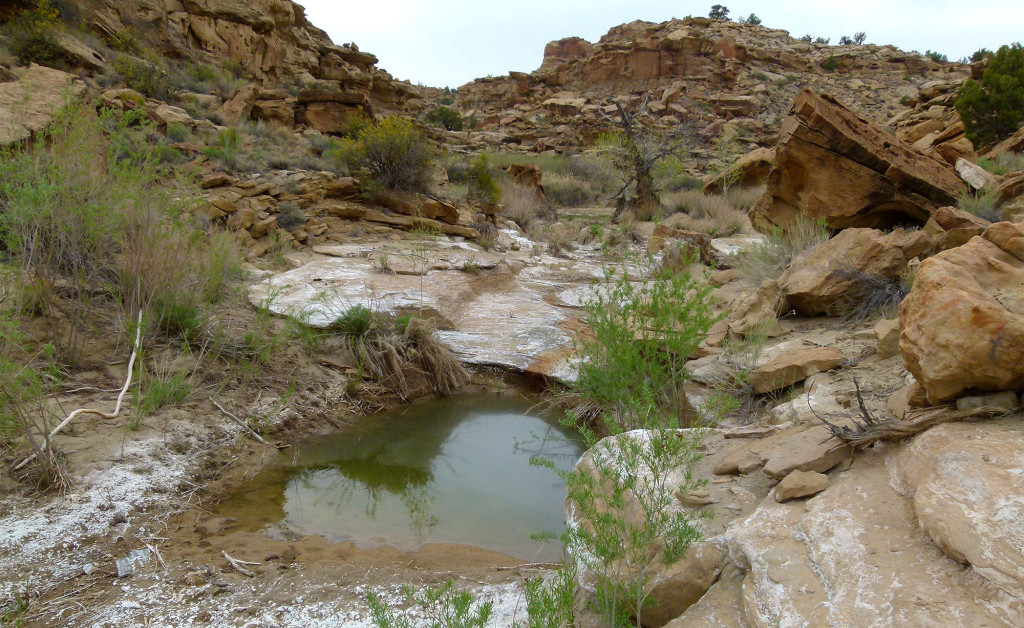
A little farther up the canyon I came to a stretch of white evaporated salt crust. This is commonly a first sign of water nearby. I didn’t see any outbreaks of water, but I did see a shallow hole which somebody had dug — with a small pool of water in the bottom. I hoped this did NOT mean that this would be all the water I was to find. I kept walking with the official spring still about a mile away.
The white crust subsided without there ever being any surface water. But, as I approached the spring the white stuff returned and soon there was actually surface water. Then… the big pool below a stretch of running water which marks the spot of the official spring. I stopped here to filter and refill my water — it’s the same spot I did so the first time I was here many years ago. There are cows in the area and the water has a slight slimy feel and a bit of an aftertaste — but it was still great just to have a natural source of water. If this spring had been dry, I likely would not have been able to continue the trek as the next water source is even less reliable and after that it’s a long stretch without any water. So, for now I was happy.
Just up from the Swap Spring I climbed out of the canyon. It was easy to spot the exit as I’d done it before, but I strongly recommend anyone new to this area use precaution and follow the directions from the Hayduke Trail Guidebook. Once up on top of the mesa I picked my route through the junipers as clouds moved in. There were good views down into the various canyons which spider-webbed out in every direction. I stayed on the high ground in the middle and made my way north.
When I got to the next major canyon system I decided to forgo the Hayduke route that I’d taken before and instead drop into one of the upper branches of Muley Canyon. I hoped the route would be more scenic and possibly even faster with some water along the way.
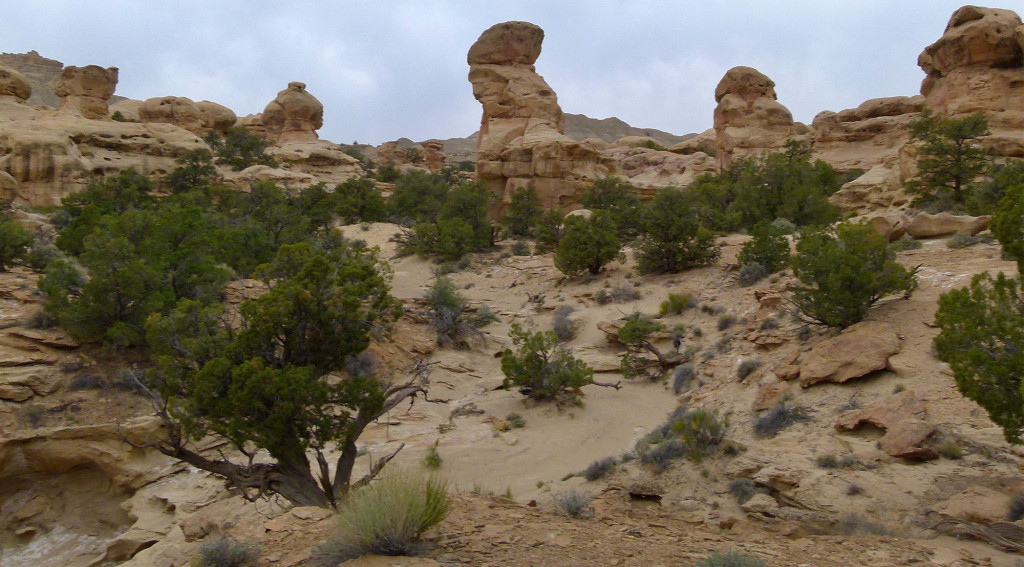
Dropping into the canyon it was already pretty cool with many 50′ pillars standing in the canyon like petrified sequoias. Rain was threatening, so I decided to make camp before getting too far into the canyon. It seemed like a good place to camp.
End of Part 1.
See the Full Gallery for Part 1: |
Open full-sized interactive map in a new window: |


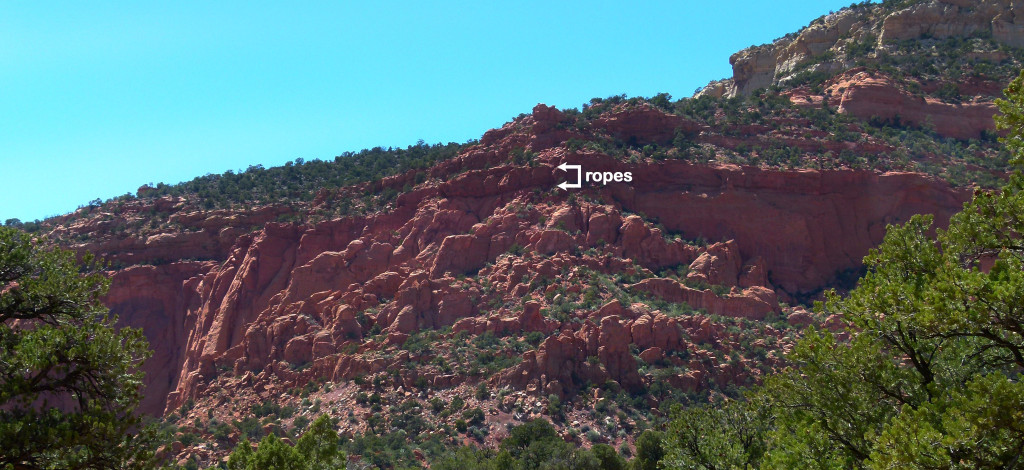


Really enjoy you site. Keep it up. Probably ten plus years ago I was on BOSS 2-week trek, and on the second day we descended off the Rim near Impossible Peak into the upper Gulch using the fixed ropes you describe, I have no idea how often BOSS replaces the ropes, but assume they have been using that route for a long time.
Do you ever give slide show/presentations? about your hikes? I’m one of the owners of the Boulder Mountain Lodge in Boulder, and I think our guests might enjoy hearing about your travels. My name is Scott Berry, at rsberryslc@gmail.com, 801-556-8515.
Thanks, Scott! Interesting to hear about BOSS using that route. I’ve done a few presentations, but mostly just for local friends/family/students. I’d love to do one for your guests, but it’d be tough since I’m based in Los Angeles. When in Utah, I’m usually busy hiking! 🙂
Outstanding narratives. Watching your videos is putting myself in your place doing something I would never do on my own. Looking forward to more videos.